Posts

Showing posts with the label Science Notebooks

Setting up your Science Notebook

Image
I am linking up with the Clutter Free Classroom to share how we set up our notebooks this week in my classroom! Do you teach your children what goes in your science notebook ?  This year we added a page to our journal to show what it would look like to set up our notebook.  First...we all glued down our table of contents .  This is a form that shows what we are teaching during the year with a blank space for writing down page numbers. I printed it out on a half sheet so they could glue it into their notebook on the first page as a place to start. Next, we made a title for the first unit: Science Inquiry. The students were able to personalize the page (and will continue to do this throughout the year as we explore new topics.)  This is an example of Emma' s page: Okay...so once we have done this it's time to get down to business.  I wanted a page that shows the set up of a notebook entry.  First, we discussed it as a class and I wrote it on an anchor ...

Thinking about using Science Notebooks this year?

Image
     There are so many different approaches to science notebooking and my approach is based on the method developed by FOSS and the Lawrence Hall of Science. I have been to a week long training with them at the NSTA conference in Philly as well as a few other sessions in St. Louis. I have seen a sneak peek into the new 3rd Edition of the FOSS kits and know that notebooking will be embedded in each and every lesson! But, I also know that science notebooks can be used with any kind of inquiry approach to teaching science. Inquiry is all about questions...which is why we start with Focus Questions for each lesson. But what comes next? Science Notebooks should be broken into four main components: Planning the Investigation (includes Focus question, predictions, planning and procedures) Data Acquisition and Organization - narratives, drawings, charts and tables, artifacts, or graphs Making Sense of Data - frames and prompts, claims and evidence, conclusions and p...

Nature Journals

Image
I have a new passion...those of you who follow my blog know how much I love and use science notebooks.  Recently I stumbled across a resource for Nature Journals from a blogger who uses this for homeschooling.  Her resources are amazing!! Check out Handbook of Nature Study for a ton of ideas including the outdoor hour challenges, seasonal nature walks and my favorite Nature Journals. The idea of Nature journals is to go outside with a focus for the day and sit and draw what you see.  The kids I work with found it very relaxing and continued to do it on the weekends too!  Here are a few pictures of my students nature journals from my after school club... I see myself spending many hours this summer sitting and observing nature...at the beach, in my yard and at the local parks.  I certainly can not wait....

Measuring mass....

Image
Our measurement unit continues and this week we are on to mass.  We started with the gram unit and used our gram stackers to measure three small units - a wood chip, a washer and a tile.  At first, we felt the mass in our hands and tried to put them in order from heaviest to lightest.  This lesson comes from Measuring Matte r the newest FOSS kit. Then we actually weighed them and recorded the mass in our notebook. It's a simple way to start, but sometimes that is the best way to make sense of mass. You can see the set up of our science notebook really well in this entry: Focus Question: Data - trial one and trial two Conclusion Next, we were able to put the steps in order to show how to measure mass using a balance scale. I think these lessons are simple in nature and therefore make an impact on our students.  When you teach measurement, it is so easy to teach it through worksheets and center games.  Don't forget to actually get out there and measure real object...

How do you recognize parts of an inch?

Image
Here in Virginia our studnets need to know how to measure a picture to the nearest inch, 1/2 inch, 1/4 inch and 1/8 of an inch.  How do we teach it? Let me show you.... First we started by passing out inch rulers and drawing three inch lines.  Then we divided one line in half, one line in fourths and one line in eigths.  Then we colored each section to show size. It looked like this in their science notebooks. Part two - we went outside to our school garden in search of objects that were less than one inch.  The students had so much fun measuring objects in nature and recording them in their science notebooks. They found a ladybug that was about 1/8 of an inch. Here is a sample of the notebook entries from one child.... I don't know if you can read it, but it says A growing white flower (1/8 of an inch). A pebble (1/4) of an inch. The inside of a yellow flower (the stigma) 1/4 of an inch Ant = Half an inch 

Vocab Strategy - embed it in science!

Image
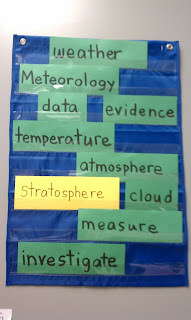
My reading specialist just spoke with the staff about language development. My school is a typical suburban school where we have many economic ranges.  However, lately our lower economic level has increased.  With poverty, comes delays in language.  Traditional methods of teaching vocabulary doesn't work very well for most of those students.  What does work?  Embedding language into your content area.  So when do you teach content vocabulary? Many teachers think they need to teach words before the encounter them.  But, research has shown that students really remember words better if they have the experience first and learn the words as they go.   Think about how toddlers learn words? As they go...when you see a bird, you say "Look at the bird."  You don't teach them bird without a bird nearby, that would be crazy.  So why do we do that in school? Here are a few strategies that I feel are the most beneficial... I know you have heard me s...

Writing up an Investigation

Image
Yesterday I talked about how we practiced writing up an investigation.  Today I am going to tell you how we did it for "real." I started by telling the children that today's work was something I was going to count for a grade.  I explained to them that we have been working on guided investigations for a while and now was the time for them to create their own investigation.  I posted the rules on the whiteboard: You will need to have 1. a question to test 2.  a prediction 3. a plan 4. some written data 5. a conclusion such as "Today I learned...."        I told the students that they would be working in their science groups on this task.  Each child would be expected to work together, but each notebook would be graded individually.  They are pretty familiar with the Science Notebook Rubric that I have and so they were well aware of my expectations. Before we started I helped them brainstorm some ideas to test with their electro...

Do you practice how to write up an investigation?

Image
Practice... I just finished watching my son play in a championship basketball game for his U9 team at the YMCA.  As I watched, I thought we never could have gotten here without the specific and targeted practices each week.  The coach watched each player and would have them practice what they needed.  Some may practice free throws, some layups, and some defense.  But put it all together, and we won many basketball games.  Not bad for a child who had never played before! Now, why am I telling you this? So often I think we expect kids to perform to high expectations without the practice it takes to get there.  In my classroom we have been working on building electromagnets and we were ready to move to the next step - designing your own investigation.  I wanted them to be able to think of the question, make a prediction, record their data and write a conclusion on their own.  But before we could do this, we needed to practice.  I set up the...